Showing posts with label bracelet. Show all posts

Saturday, August 30, 2014

DIY '90s Tattoo Choker

 
Since being a little kid, I've always loved the look of wearing chokers. I've decided to recreate this retro look of American 1990s fashion with just some thin black plastic-coated wire, a pair of pliers, and some mini copper seed beads.
With 0.38mm Beadalon stringing wire, I measured out 3 feet for a bracelet and 6 feet for a choker. I folded the string in half and began looping it, and placed one seed bead at the end of each loop. After a couple hours of looping, I added a crimp bead to the end of my string. For the choker, I also added a lobster clasp to the end since my wire string is not very stretchy (this type of jewelry is usually made with stretchy magic string, but I used plastic-coated wire). The choker I used to wear when I was little has gotten pretty stretched out from being worn so much, so adding a clasp helps to prevent the jewelry from being stretched out as well.


I love the look the little beads add -- they help make the chokers look slightly more elegant, while still a little bit edgy.

<3 Mandy

Sunday, March 24, 2013

Braided Leather Bracelets


I recently bought some swatches of leather in cherry red and beige from a reuse store because I had some craft ideas in mind. I cut the leather into 1" by 9" or 10" strips, and in each strip made 2 slits so I could "magic braid" them. Here are some photos of the bracelet-making process.


special thanks to my sister, the hand model
  
With some leftover leather I had, I also made a little bow for my hair by pleating and sewing a rectangular strip onto a barrette.

<3 Mandy

Sunday, September 23, 2012

Gimp Bracelets

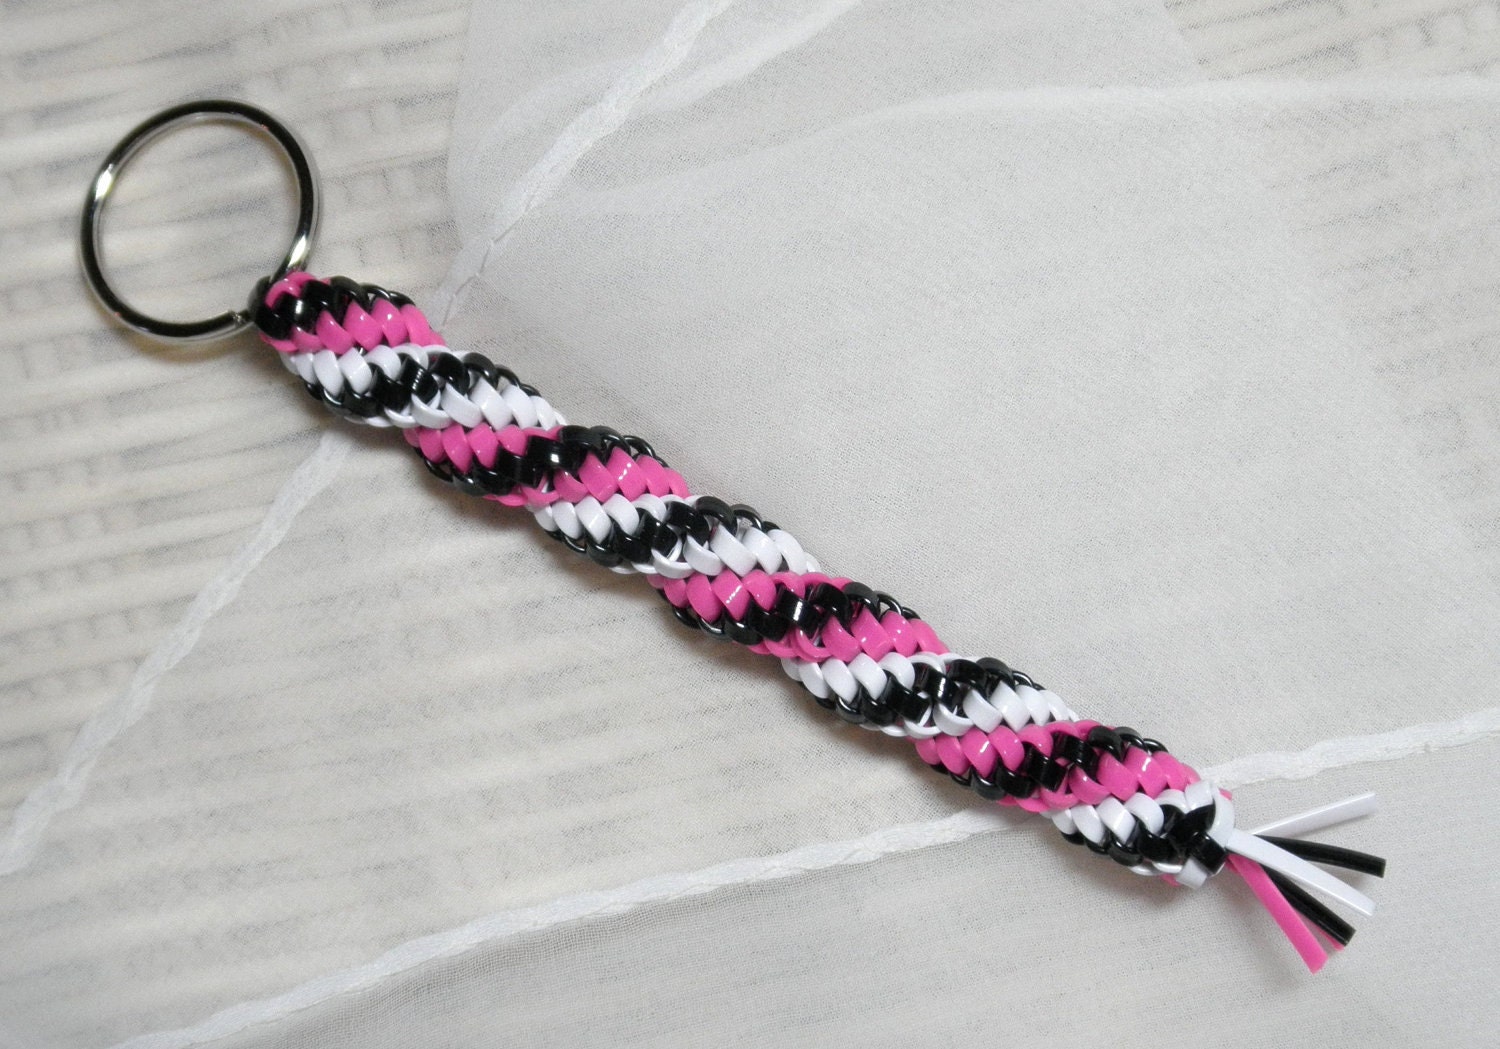
I made these colorful bracelets out of plastic lace and chain, inspired by these bracelets by helloberry on Etsy.
helloberry Bracelet: Mini Smoothies (Listing for ONE bracelet)

When I was younger, I always enjoyed making lanyards to hang on my backpack, like these.

So with the plastic lace I had, I decided to make some arm candy!
Details: 58 stitches (40 and then 18 double-threaded) on plastic lace; 25 links of rose gold chain.

<3 Mandy

Wednesday, September 12, 2012

Magazine Paper Bead Jewelry

A couple of years ago, my sister bought me a magazine paper bead bracelet from the deYoung Museum. It's from a company called Mzuribeads that gets handrolled beads from women in Uganda to make recycled fair-trade jewelry.
I love my bracelet and wear it all the time, and I wanted to buy another one. However, I did not see any bracelets being sold anywhere.
So I decided to make my own.
To make my necklace, I rolled up long triangular strips of colorful (and recycled) magazine paper into tubular beads, and then secured their shape with a dab of glue, a coat of mod podge, and a top coat of clear nail polish. After allowing the beads to dry, I strung them onto a piece of thread with seed beads to make a long necklace. Depending on how many times you wrap the necklace, it can be a long necklace, a double-stranded necklace, or a multi-stranded bracelet.
I've made a few of these as gifts and for myself, and I love the look they add to outfits. I gave one of these to my aunt, and my cousin bought a similar one in Africa for her, as well!

These necklaces are very easy to make, and they only take about an hour (plus drying time).
<3 Mandy

Monday, August 20, 2012

Crazy Crafting Times (and crepes)

This morning my friends and I made crepes for brunch! We filled them with chocolate and fruits. They were yummy.
my crepe, filled with strawberries, raspberries, blueberries, nutella, and chocolate chips

I made some friendship bracelets for each of them, for some other friends, and for myself.

hearts for lovely friends


Also, my friend whose house we were at gave me this awesome button! It's pretty self-explanatory why I love it... Thanks, Bri!

And an update: I've made a lot more chip bag purses this summer, for a total of 11 completed bags since my last post about them. Still a lot more to go, though, seeing as to how many I have yet to assemble...


I've been making tons of crafts lately, as well as finding tons of inspiration, so I'll be busy with more DIYs until the summer runs out and the new school year begins.
<3 Mandy

Monday, July 30, 2012

Canada in Pictures, Part II (Crafts and Games)

In Canada, since we were on vacation, we had a lot of free time. So we played a lot of games, from backgammon to bananagrams to rummikub, all the time! Since bananagrams is portable, it was easier to carry around to the park or a restaurant. Here are some of the places we played!

backgammon set-up
bananagrams at cafe santropol

playing scrabble off the board

My aunt and uncle had collected a lot of wine corks for a bulletin board they had wanted to make. So I made this cork bulletin board while we watched Father of the Bride.


Their little niece and nephew came over for my aunt's birthday party, so I promised them these two friendship bracelets.


I had so much fun on this trip and can't wait to return next year!
<3 Mandy

Thursday, April 5, 2012

Recycled Jewelry DIY

Toothbrush Bracelet

I saw one of my friends wearing a toothbrush bracelet a couple of years ago and recently looked up instructions online for how to make them. In the meantime, I collected about twenty toothbrushes in various colors. I have found that clear plastic toothbrushes with as little rubber on them as possible work best.

Here are some instructions on how to make your very own!
  • Wash brush
    • Optional step: Try to pull out as many bristles as possible with pliers

    • Boil for about 5 minutes or until your brush is bendable

    • Remove excess bristles (they should fall out easily because the boiling water should have loosened up the holes holding the bristles)
      • Note: I was surprised to have found that there are little metal plates inside the toothbrush! I guess it doesn't really matter whether you pull these out, but I got shocked a little bit when pulling out the bristles, so I just got rid of them to prevent any other accidents.
    • Quickly bend toothbrush with tea towel into desired shape
      • A good way to make sure your bracelet fits around your wrist is to bend the brush around your wrist (obviously). However, if you find that the brush is too hot against your sensitive skin, find a jar that is approximately the same diameter as your wrist, and wrap the toothbrush around that jar. You could also freehand it, but I recommend wrapping the brush around something first to get the hang of it. After a few times of doing this, I could just freehand it pretty easily.
      •  If your toothbrush does not bend very easily or is not in your desired shape, drop the brush back into the boiling water and try again.
      • Drop toothbrush in pool of cold water.
      • Let cool and dry on a towel
      • Wear!

      Sometimes the toothbrush won't bend properly. If this happens, it might mean the plastic is not the right type for this bracelet. In case this is not the case, you can just put the toothbrush back into the boiling water and try again.

      some of the toothbrush bracelets I made

      wearing toothbrush bracelets with friendship bracelets

      This project only takes about 10-15 minutes to do, and you can make many bracelets at once. It is a great way to recycle and make beautiful bangles! I have gotten many compliments on mine. Since I made some in pretty much every color, I usually match them to my outfits and wear a couple at a time.


       ♥♥♥


      Soda Tab Bracelet

      Once again, I saw one of my friends wearing this bracelet and looked up instructions on how to make it.
      You can use different types of tabs (such as red bull for little bull design, monster for different colors, some sodas have a square-ish shape, etc.). This is the site I used for instructions.

      I love how flexible they are, how you can turn them inside out, and how there are many shapes and colors of tabs to use! To connect the tabs, I recommend using elastic cord (in 1 or 2 colors) if you want your bracelet to stretch. Here are some photos of bracelets I have made.

      my first bracelet, attached with purple lanyard

      a bracelet for a friend, using red bull soda tabs and orange elastic.
       (I only used 1 cord because 2 would be too thick to go through the holes)


      you can flatten your bracelets for convenient storage


      I hope you like these bracelets and enjoy making your own!
      <3 Mandy